Now that we have our neckband and waist ties assembled, we’re going to connect them to each other. This is the trickiest bit of this entire dress, so let’s get going.
I thought a video might be most useful. Below, you’ll see what it looks like to run through the steps in the instructions.
And here’s the photos, step-by-step
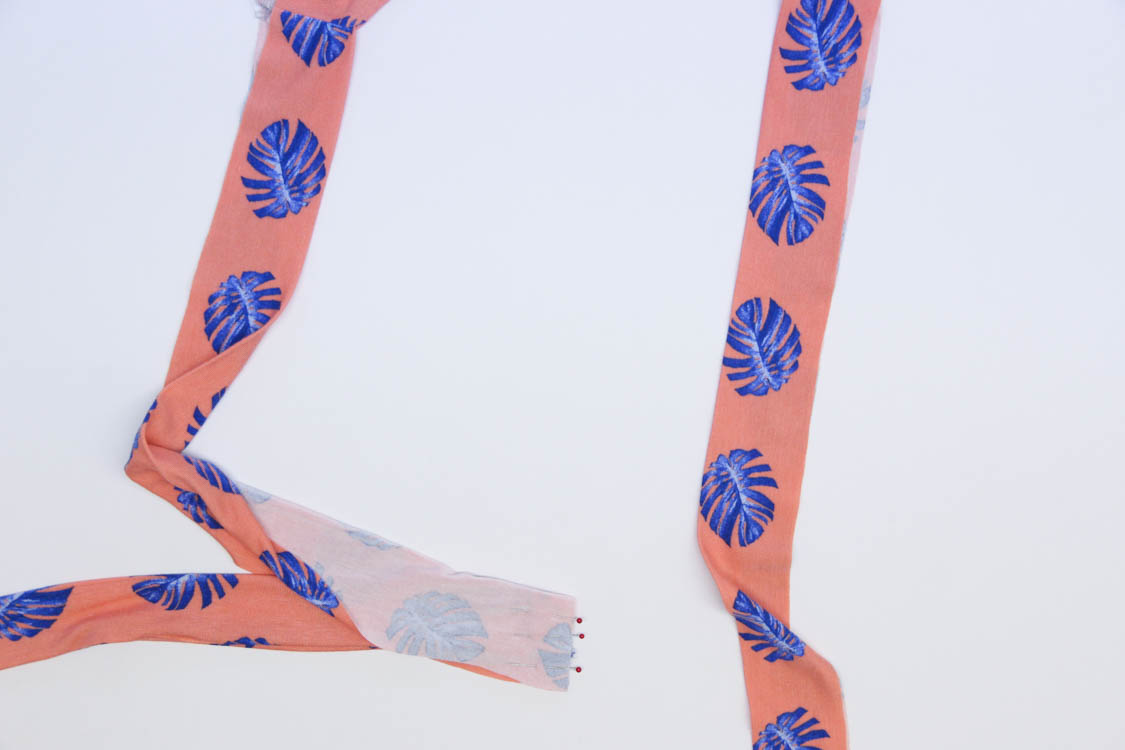
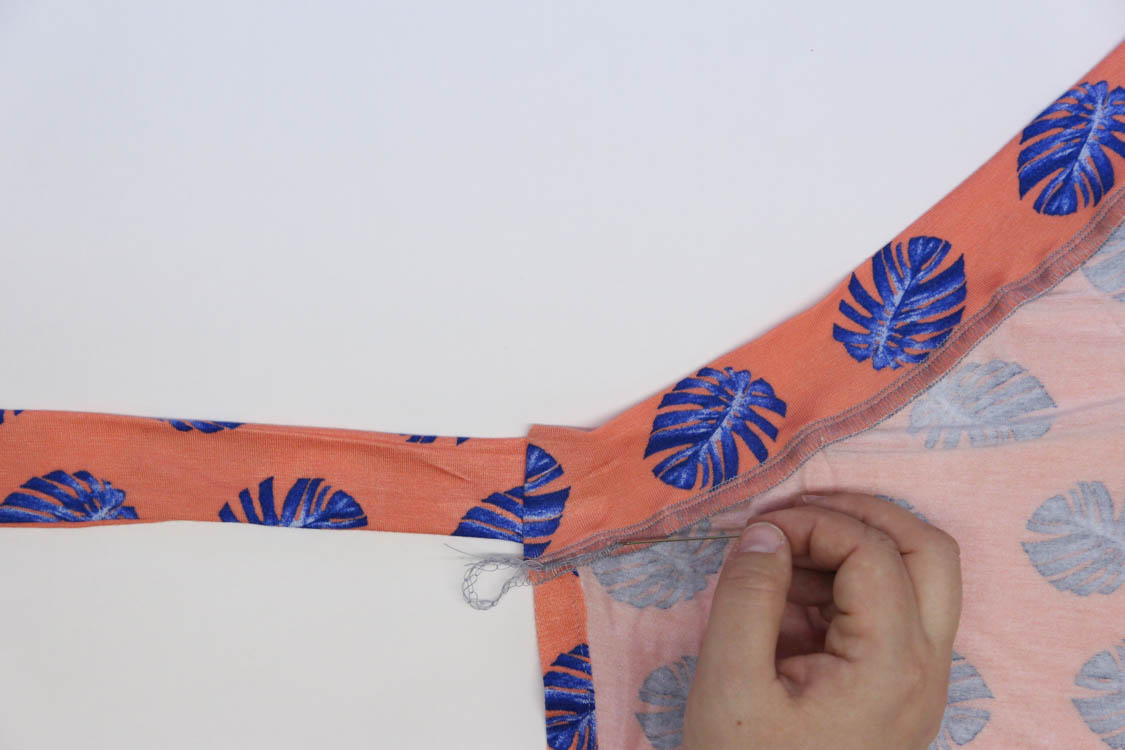
Open up your neckband piece at one end, right side up.
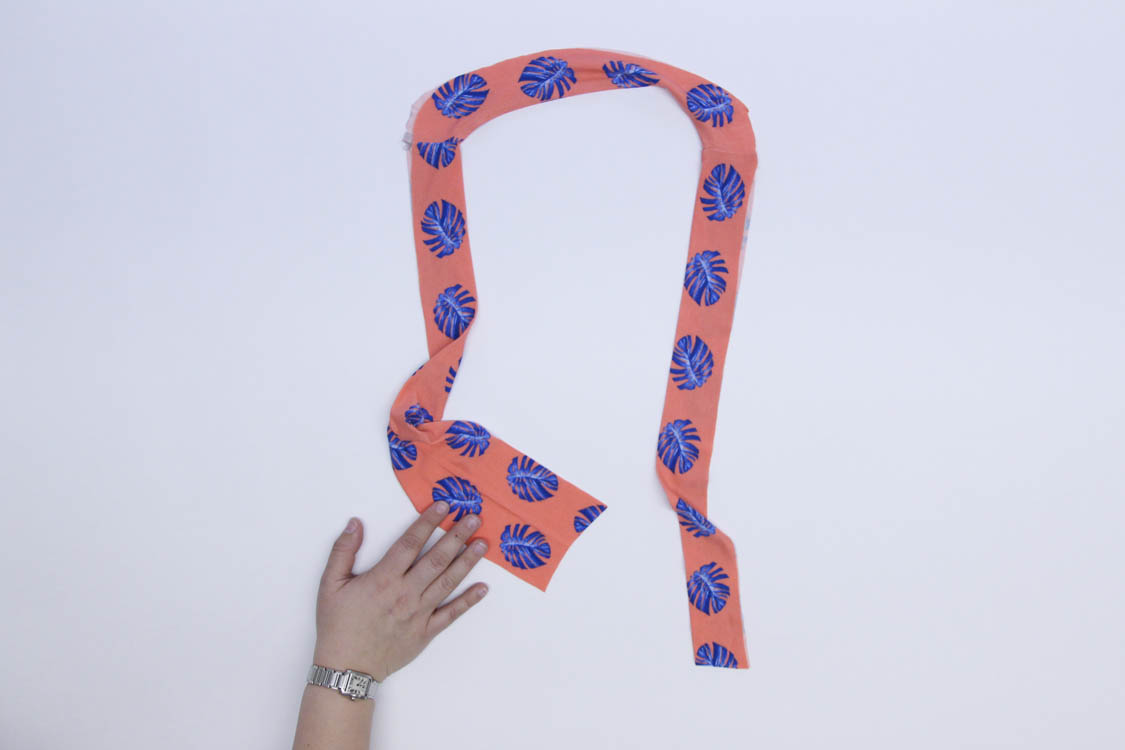
Now place one waist tie into the “V” at the end of the neckband, as shown below.
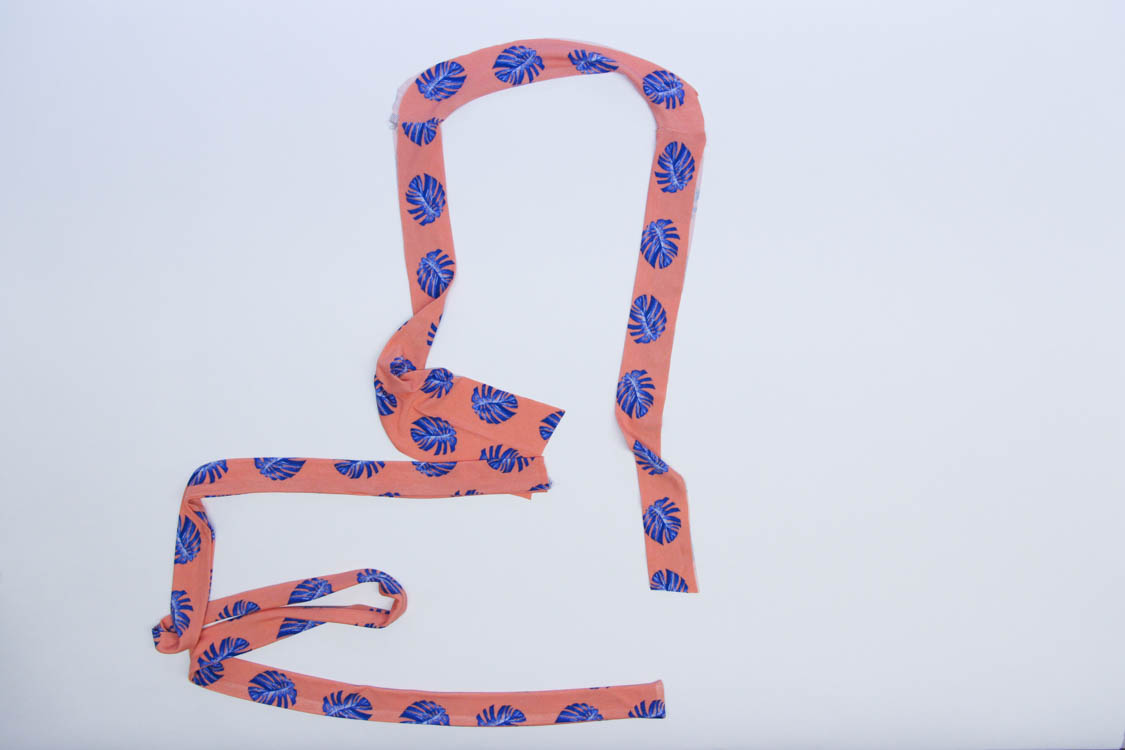
Fold the neckband over the waist tie, so that the tie is sandwiched in between the two halves of the neckband.
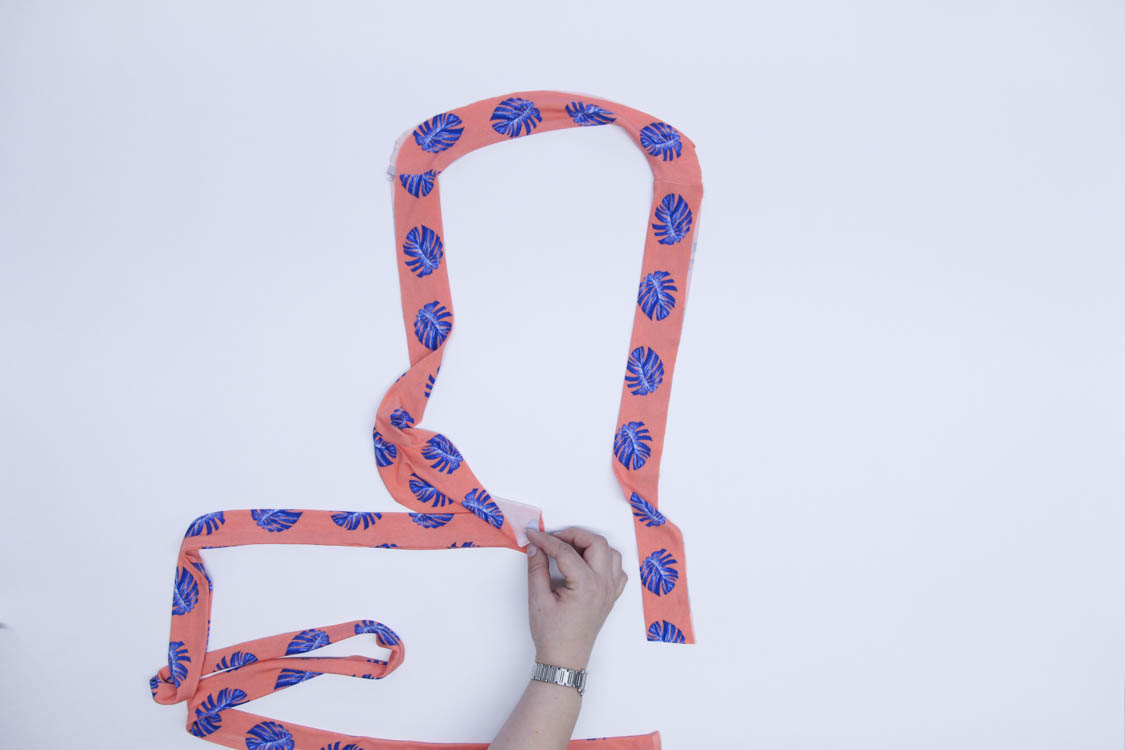
Pin, so it looks like this:
Sew across the end, securing the waist tie into the neckband end.
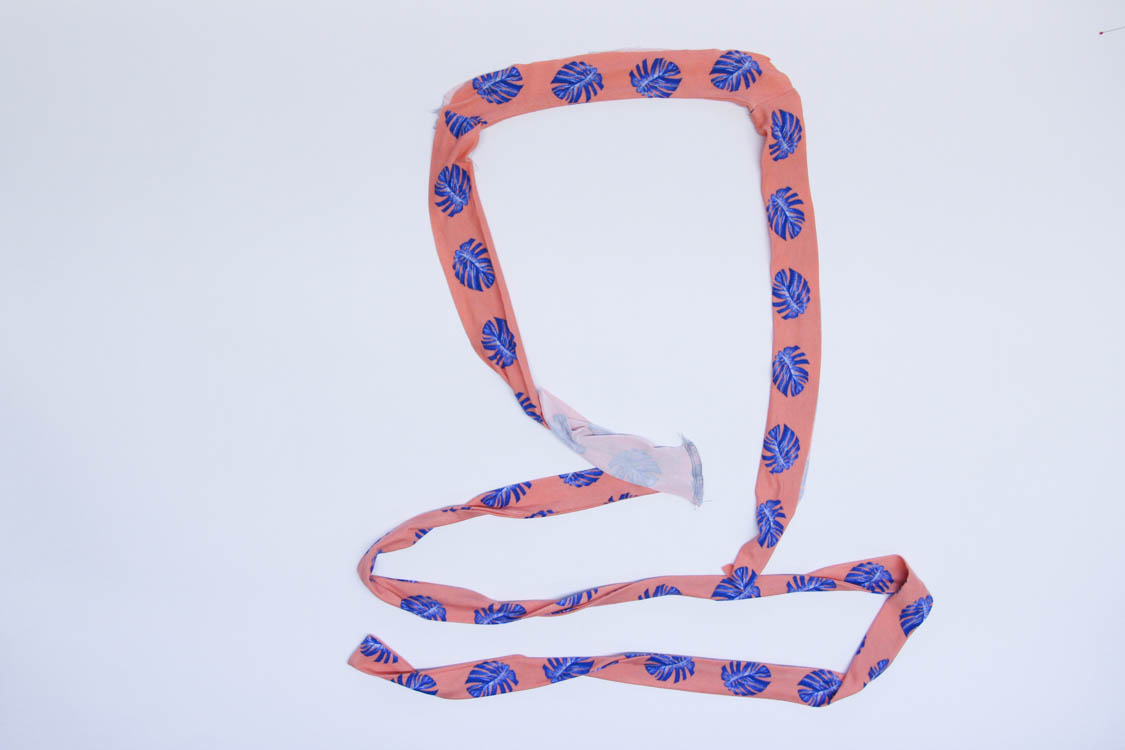
Repeat with second end of neckband and second waist tie. Pull waist tie out of the neckband and turn everything right sides out, and press.
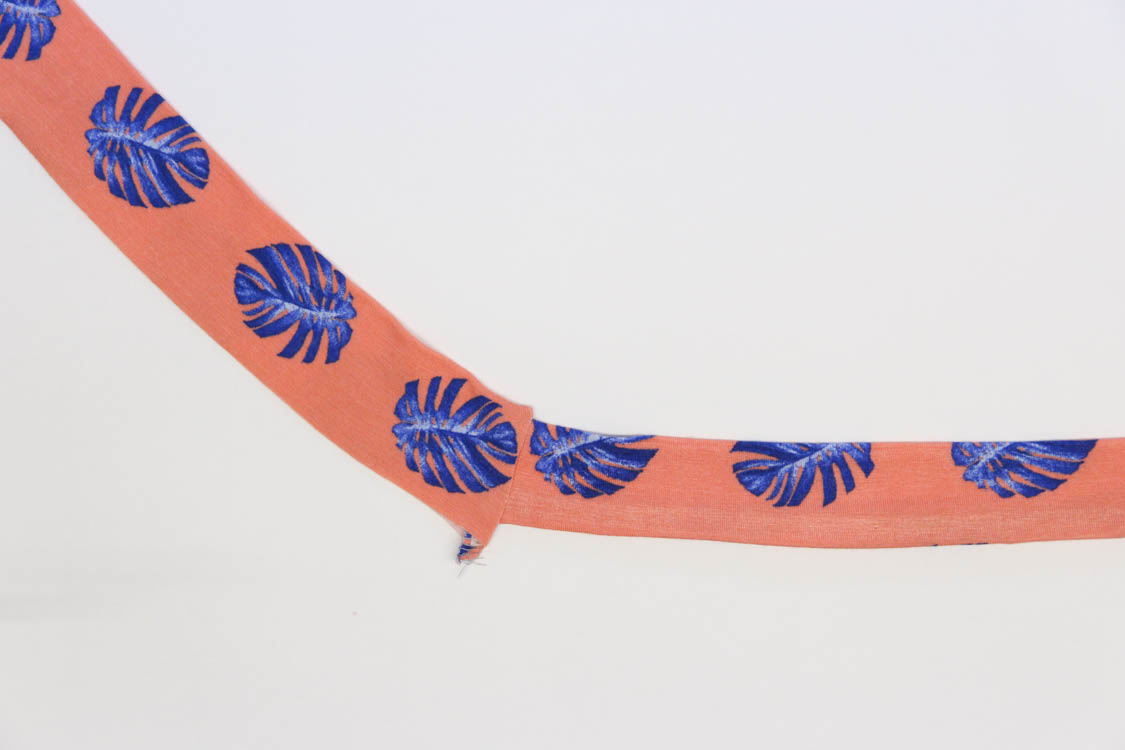
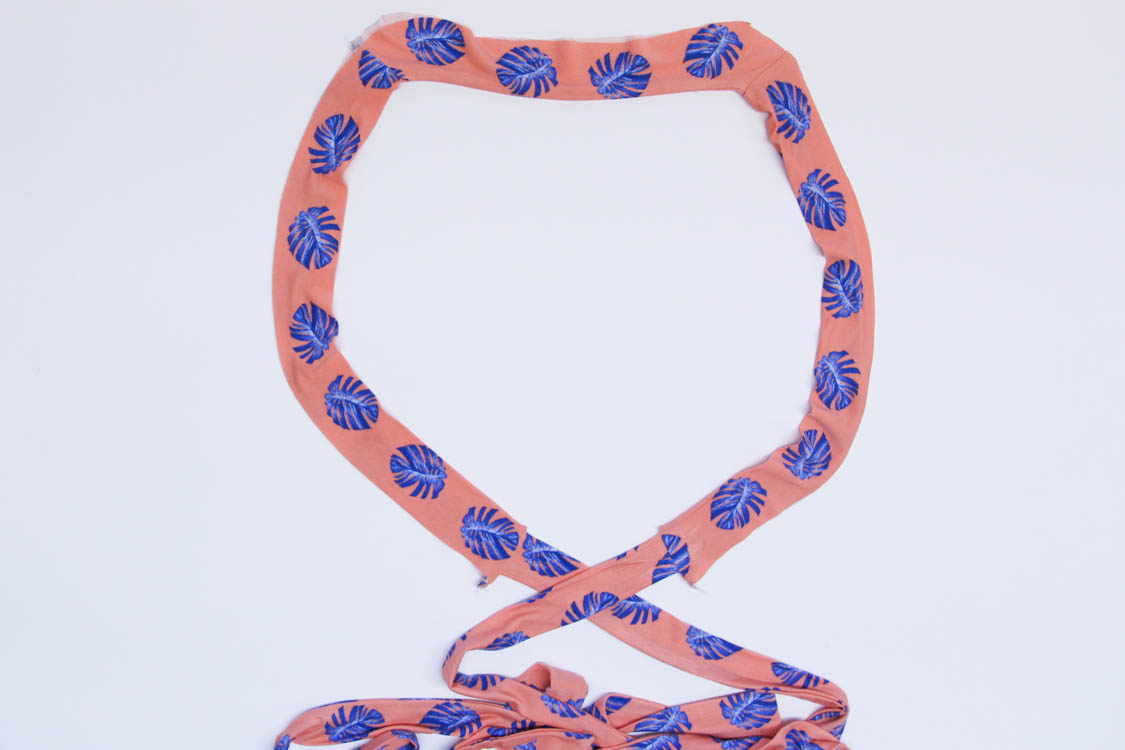
And now you have one very long waist tie – neckband – waist tie piece!
Lastly for today, let’s get this beastie attached to our dress! When you go to attach the neckband, at first it might seem like you did something wrong, but the neckband is drafted to be significantly shorter than the front wrap. This is one of the bits that helps keep the dress from gaping. On my size, it was over 2″ shorter!
Line up and pin the shoulder seams and the back neckline notches. Next, you’ll want to carefully line up the seam where your neckband joins the waist tie with the edge of your front wrap to ensure a clean finish.
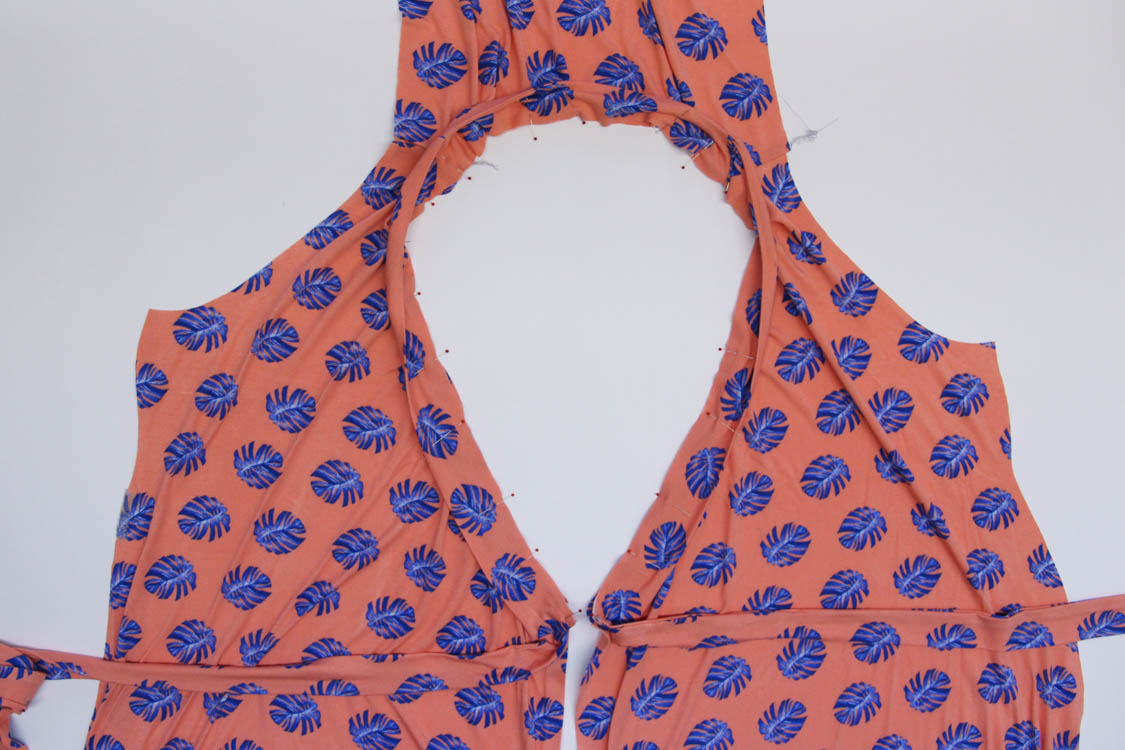
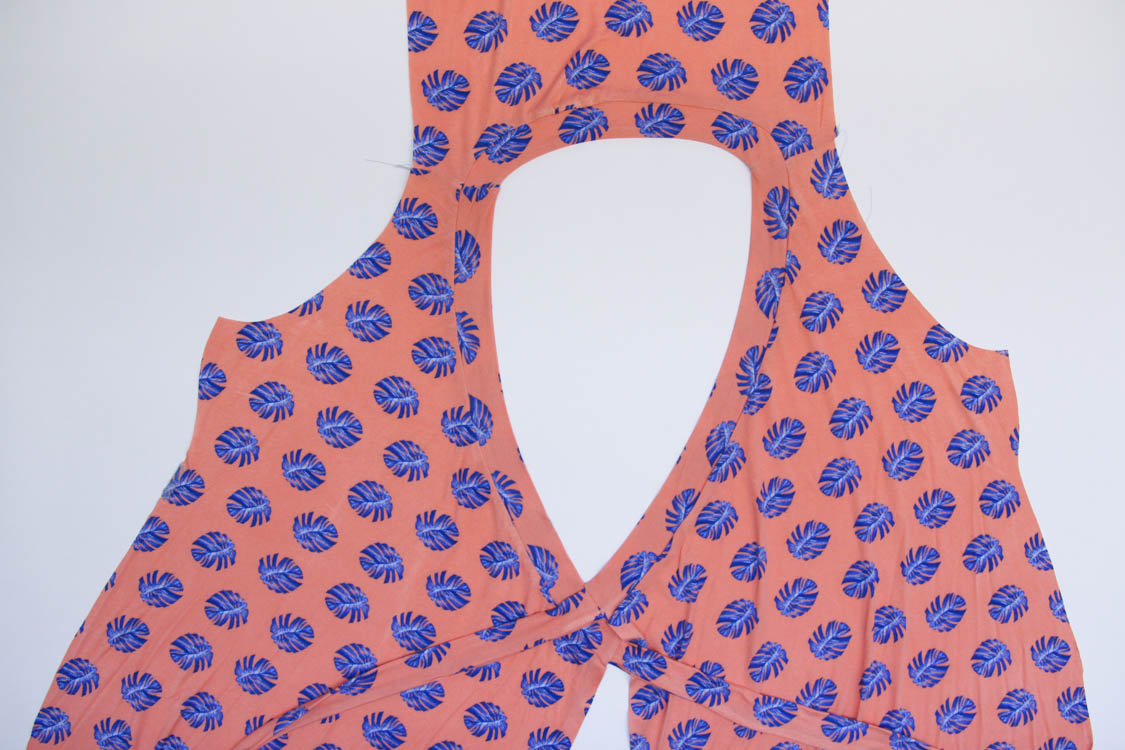
Ease the front wraps into the neckband and carefully sew, stretching the neckband as you go. Press the seam allowance down towards the dress.
Use a hand needle to secure the end of the stitching back into the seam allowance.
Optionally, you can stitch the seam allowance down with a small zigzag stitch, a twin needle, or a coverstitch.
When you’ve finished this seam, don’t fret if it looks a little puckery. When it’s on the body, the neckband stretches and skims your curves, keeping you well covered.
That’s it for today! Next week, we’ll be sewing in the sleeves and side seams and hemming the sleeves and the dress. Only three more posts to go!

Very helpful video. I did it slightly wrong as I couldn’t quite get the instructions. It turned out OK anyway. I finished my muslin yesterday and love it. I need to move the slot for the tie down about two inches to get it closer to my waist. Other than that, the 20 C/D cup fit perfectly. Amazing.
I’m still being such a chicken to cut into my pattern because I have a figure like a pickle. It’s between a 14-16 C/D for the bust, a 22-24 for the waist and 14-16 for hips. Reverse of these gorgeous curvy girls! I’m only 5 ft 1. I’m thinking of using the size 20 and then increasing it out to the 22 or 24. Does anybody have any ideas? Thanks! Jenny C.
Jenny,
Use the 14-16 C/D size pattern so it will fit around the shoulders, neck and sleeves. It is easy to make the waist adjustment.
I am really confused by the waistband/neckband attachment – i followed the video but it came out on the wrong angle and when i went with my own thoughts i had a big change in level between the neck piece and the waist piece – any help appreciated – the pattern wasn’t very clear either! Thank you
I found it helpful to sew the raw edges of the neckband together before I pinned the waist tie/neckband/waist tie to the body of the dress.