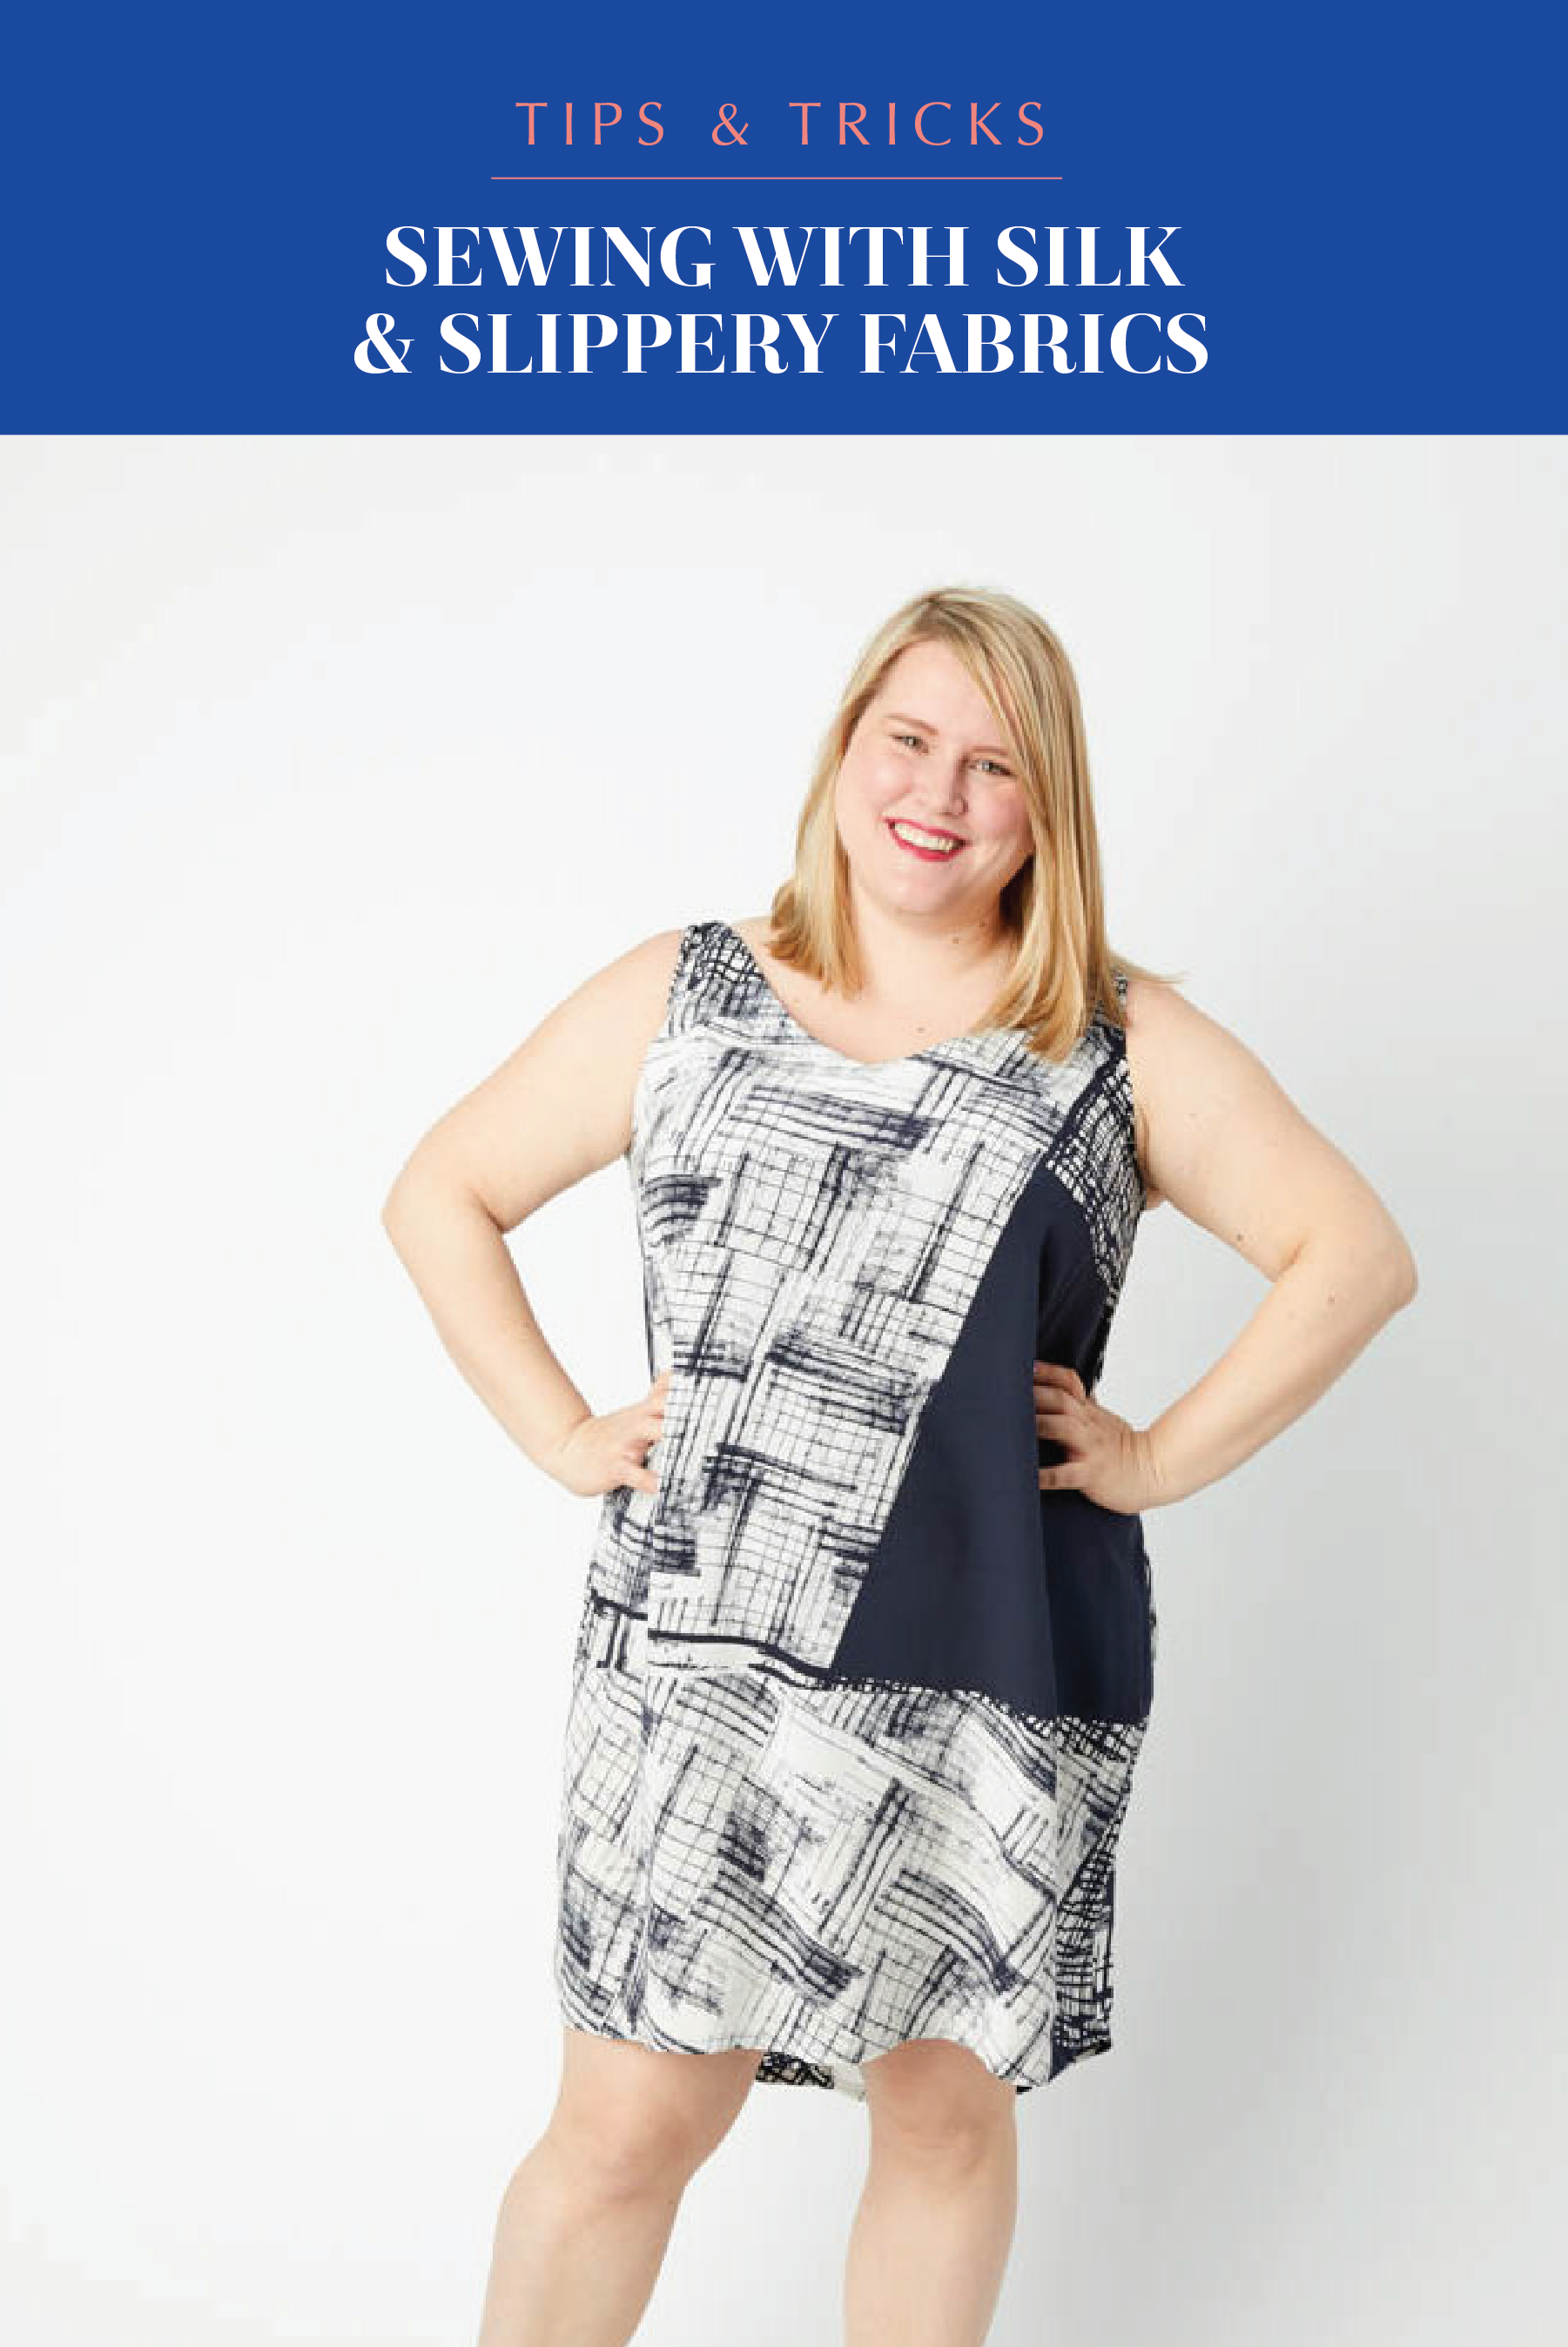
In preparation for our Webster Top & Dress sewalong, we thought we’d share with you some tips on sewing with silk. The Webster is the perfect pattern to pair with silk and because it’s not too complicated to sew, it could be a great first silk project!
Sewing with silk or other slippery fabrics can be intimidating at first, but with preparation and practice, you’ll be cranking out silk tops in no time! Today, we’ll talk about preparing, cutting, and sewing your silk.
Preparing Your Silk
Believe it or not, most silks can be machine washed! Now, I wouldn’t recommend taking your favorite silk shirt and tossing it in the washing machine, but if you prewash your silk fabric in the washing machine, you’ll be able to machine wash the finished garment. Something to keep in mind: machine washed silk loses some of it’s shine, so if you want a high-shine garment, you’ll need to dry clean. Also, take a swatch of your silk and machine wash it to see how it holds up. The silks from the Webster Top & Dress kits have all been machine washed when making samples!
If you are not going to machine wash your silk, take it to the dry cleaner before you sew with it and have it pre-cleaned. Silk can shrink depending on how it’s treated, and a shrunken silk garment is a sad thing indeed.
If you have machine or hand-washable silk, you can use gelatin to stiffen the fabric and make it significantly easier to cut and sew. I’ve also heard you can use cornflour or cornstarch but I haven’t tried that myself.
To stiffen your fabric with gelatin, mix 1 teaspoon for every 16 ounces of hot water. Depending on how much yardage you want to soak, you may need 1 – 2 gallons of mixture (128 – 256 ounces). Let this mixture sit for 30 minutes to activate the gelatin. Add in your silk and mix it around so it all gets soaked. Let it sit for an hour in the gelatin mixture. Remove from the mixture and lay the silk out to dry overnight. I often put a towel over my shower curtain rod and drape the silk over that. Once the silk is dry, it should be stiff and a little crunchy, far easier to manipulate than its usual slippery self.
Cutting your silk
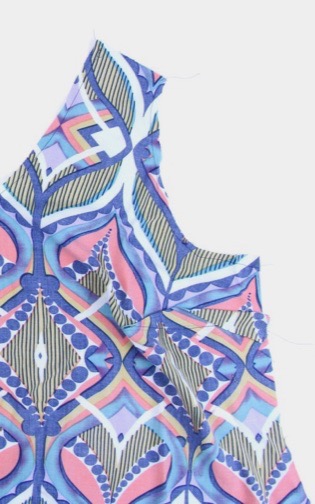
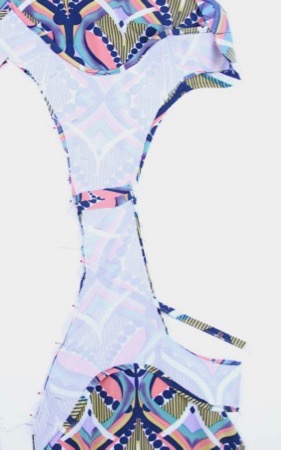
Keeping your silk nice and flat when cutting, whether you’ve stiffened it or not, is super important. It is very easy to shift it off grain while cutting; I highly recommend cutting it in a single layer using a fresh rotary cutter blade. If you don’t have a rotary cutter, trace all your pieces using a chalk marker (test your color first to make sure it comes off; this can be v. sad!). Make sure you cut your fabric with a very sharp pair of scissors. When you cut seams on the bias (like the v-neck of the Webster), I’d recommend immediately stay-stitching those pieces when you cut them out. I often will have my machine set up near by so I can take my freshly cut piece straight to the machine.
Sewing with silk
There are a few tools that make sewing with silk much easier. Here are my recommendations:
- Super sharp, thin pins like these
- Wonder tape for hems, which make it so much easier than trying to pin double-folded silk
- A microtex needle, which minimizes the chance of creating runs in your fabric; make sure it’s a new one
- A walking foot if you have one — these move the fabric through the machine more evenly than using just the lower feed dogs
If you are going to be finishing your seams on a serger, make sure to test the serger on a scrap of your fabric first to make sure it doesn’t create runs.
When pressing silk seams, use a press cloth and a spray like Soak Flatter to help the seams press crisply.

Those are our top tips! Let us know in the comments if you have other recommendations for sewing with silk or other slippery fabrics!
SaveSave


I sew with silk a lot and I think cutting on grain I’ve found to be the most critical. I do it 2 ways depending on how slippery bad it is 🙂 I’ve sandwiched the silk between 2 layers of tissue and cut through all layers and I’ve also pinned it down to a plastic/flannel backed table cloth and cut through pattern and fabric only. This method keeps it steady and you can line up your silk along both edges of the table cloth to make sure it’s squared on grain.
I love that print!
Dumb question but…. after you soak the silk in gelatin and dry it, do you iron it?
You don’t have to iron it usually because you hang it as it dries so it should be totally flat.